 As we enter into the hottest weeks of the summer here in Ottawa, I am finding myself spending more of my evenings in our backyard, enjoying a bbq or two with hubby, sipping on some cold drinks, and taking in the beautiful, balmy weather. It’s been so wonderful to have a usable outdoor living room and be able to kick back and relax on our refreshed patio set.
If you saw my recent post, “Our Patio in Progress: 5 Takeaways for Your Home” (to see it, click here) you may have noticed these black and white coasters:

Ever since I had my eye on refreshing our patio set, I knew I wanted to make some outdoor coasters. As someone with a bit of a ‘coaster craft’ obsession (check out my painted cork coaster tutorial here), it seemed a natural way for me to begin personalizing this space. These coasters were easy and fun to make and required few materials – my kind of craft project 😉
To make your own version of these easy-peasy DIY rope coasters, you will need the following materials:
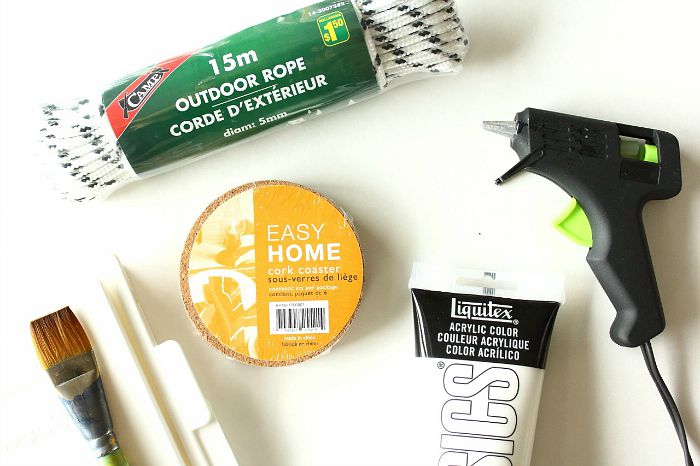
- Rope (found mine at Dollarama)
- Hot glue gun
- Scissors (not pictured)
- Fabric spray sealer (not pictured)
That’s it! However, for an alternative version of these coasters that include an even sturdier, solid bottom you will need the following as well:
- Cork coasters (thin and round)
- Acrylic paint + artist’s paintbrush
- Acrylic spray sealer (not pictured)
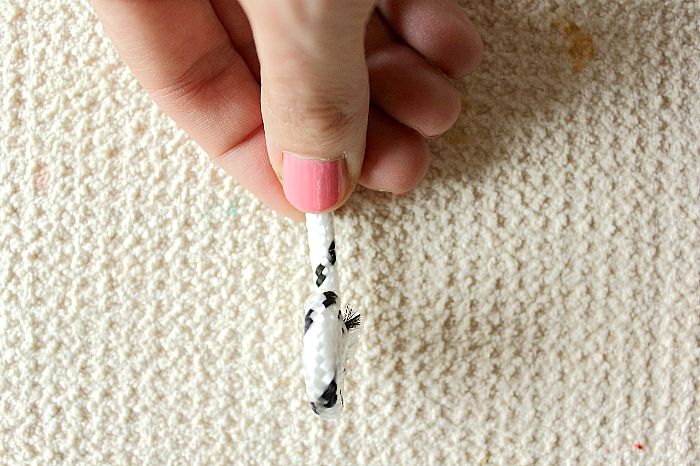
Both versions start out exactly the same way:
Step 1: Take the end of your rope, add a bit of glue along the side (about an inch to start) and begin to coil the center of your coaster:

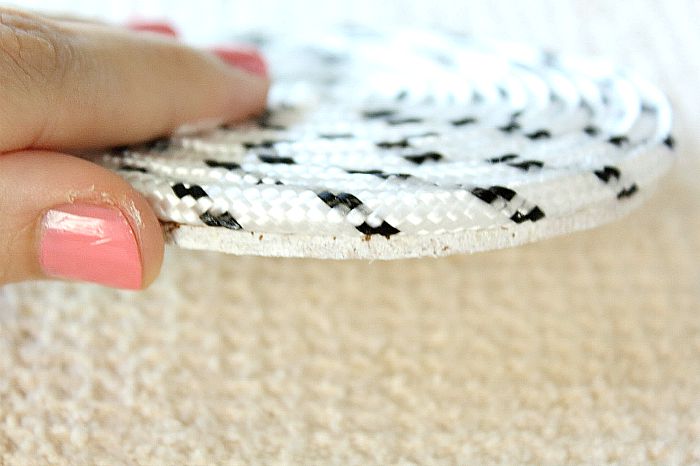
Continue the process of adding glue along the side of the rope, coiling as you go, making sure to hold the coiled rope together for a few seconds to let the glue dry before moving onto the next section of rope.
Tip: To ensure the coaster turns out flat, it is easiest if you keep the coaster on a flat surface, slowly spinning it as you secure the rope around the edge. Every so often, you can take your coiled coaster and place it perpendicular to the surface to see if it is flat.
Continue the above steps.


When you are satisfied with the size of it, then simply cut the end off on an angle so that the last bit does not bulge out. Glue the end to the side of the coaster.

Tip: In order to prevent the edge from fraying, add a bit of hot glue to it. This will harden and thus prevent any fraying.

Step 2: Take your fabric spray sealer and spray both sides of your coaster.

This prevents any staining of your beautifully hand-crafted coasters. No need to let a little wine spillage ruin a perfectly good coaster!
Optional Version:
Now, if you’d like a sturdier bottom to your coaster or if you are a little more – ahem – accident-prone, like I am, you may wish to affix some cork to the bottom of your crafty little rope coaster for added absorbency.
If that’s you, then you can complete your coaster project with these next steps:
Step 3: Paint the bottoms and sides of your cork coasters. Let dry. Acrylic is a fast-drying medium – about 20 minutes or so, depending on how much paint you’ve used.


Step 4: When the paint has dried, spray the coasters with an acrylic paint sealer. Let dry according to the instructions on the can.

Step 5: Glue the cork to the bottom of your rope coasters, ensuring that the painted side is facing out.


Tip: If you know in advance that you prefer this optional version, then make sure when you are creating your rope coasters, that you make them slightly bigger than the cork.

Tip: When choosing your cork, be sure to avoid the really thick cork coasters out there. You simply want to add a bottom piece to your rope coasters and not overpower them.
Whichever version you choose, with or without a cork bottom, these fast and easy DIY rope coasters are a lot of fun to create. They require few materials and very little time. They are a small detail, but one that helps to personalize any space, whether outdoors or in. Make these for your home or as a housewarming gift for friends and family.

 If you like your crafts fast and easy, then you’ll love these easy-peasy DIY rope coasters 🙂


For more craft ideas from some of the best crafters on the web, check out Peace/Love Link Up, That DIY Party, The Wednesday Roundup, Home Matters, The Creative Exchange, The DIY Collective, Saturday Sharefest, Share It One More Time, Outdoor Extravaganza, Creativity Unleashed, The Creative Exchange, The DIY Collective, Welcome Home Wednesdays, Creative Spark Link Party, Funtastic Friday, BFF Open House Link Party, No Rules Weekend Blog Party and Mad Skills Link Party.


Leave a Reply