 I purchased these mismatched, wooden candlesticks at a local second-hand store for $4.
 They were bagged up and hanging among a wide assortment of small, home décor ‘sets.’ While it was clear that these were not exactly a matching set – the grains were all different and the hues varied from one candlestick to another – they were close enough for me to know that I could do something pretty sweet with them. While painting them out was certainly one option, I decided that I wanted to create a more or less ‘shabby chic’ look with a bit of a twist: colourfully-distressed candlesticks were the result.
For this project, I used the following materials:

- acrylic paint (assorted, complementary colours)
- white acrylic paint (chalky finish)
- artist’s paint brush
- Vaseline (not pictured)
- rag (not pictured)
To create your own colourfully-distressed candlesticks, simply follow the steps below:
Step 1:
Using your acrylic paints, paint each candlestick a different colour. Let dry.


(I quite liked how the colours turned out. I contemplated leaving them as is, but really wanted to stay true to my neutral décor scheme).
Step 2:
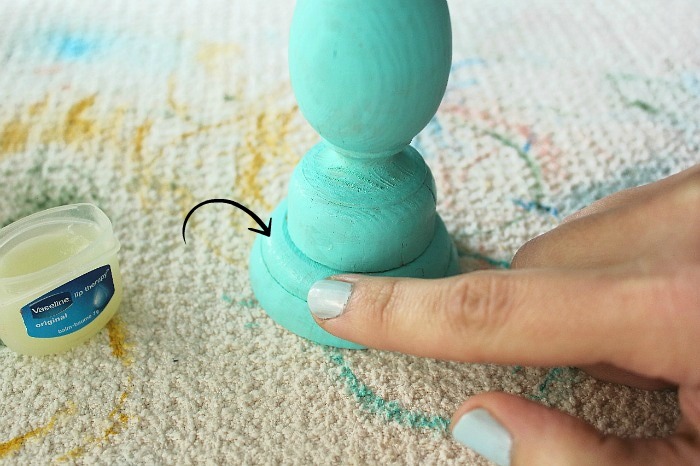
In order to create a distressed look, you will need Vaseline.
 Take a small amount – just a tiny bit will do – and smear on various spots where you’d like the colours to peak through. (If you look really close, you can see the Vaseline as I apply it to the base).
Using Vaseline will prevent your outer layer of paint from adhering. So, the more areas you smear, the more colour will peak through. If you want to stay as true as possible to a more realistic and ‘aged’ look, you’ll want to stick to areas that would normally get worn, primarily the edges. In my case, I simply wanted streaks of colour throughout, so I was not too concerned about creating a ‘true’ distressed look.
Step 3:
Using your chalky paint, begin applying the outer colour.

Apply one to two coats (waiting for the paint to dry between coats). I applied two coats for this project.
Coat 1: If you look closely, you can see some of the ‘translucent’ streaks where I applied the Vaseline.

Coat 2: You can see most of the same translucent bits, even after the second coat.

Step 4:
Taking a rag, rub the chalky paint off where the Vaseline had been applied.

Since the paint does not adhere to the Vaseline very well, it will come off pretty easily. I did find, however, that the less time I gave the final coat to dry, the easier it was to remove the paint. Since acrylic paint takes about 20 minutes to dry, I gave the final coat a maximum of 10 minutes before trying to wipe the outer layer off. Experiment on your project and see which works best as you move from one candle to the next.


[One of the reasons I chose to use Vaseline is because with it you can create the ‘chipped’ look you see here. If you prefer a softer appearance (i.e., less ‘chippy’), then sandpaper is your best bet. Just make sure to apply the sandpaper with progressive pressure so that you don’t end up removing the colour accidentally.]
Tip: When doing this part of the project, start in small sections, so you can track where you’ve placed the Vaseline. Sometimes it was hard to tell where the Vaseline was and in other cases, it was easy to tell since the paint was more translucent. To make it easier to track, simply divide the candlesticks into 3 sections: the base, the middle and top.
This is the order that worked best for me: Apply Vaseline to the base. Paint the first coat of the chalky paint immediately thereafter. Let dry. Paint the second coat. Let partially dry. Use rag to remove paint. Then move onto the middle section and repeat. The same for the top.
And voila! You have some sweet, shabby chic candlesticks with lovely bits of colours peeking through.


 I loved the way these turned out. They are versatile too, whether displayed as a grouping or in smaller numbers of three or as a single candle – it’s just a matter of choosing 🙂


Leave a Reply